Shooting Stars: Your Guide to Capturing Stunning Night Sky Photos
The stars have fascinated us for centuries. Their presence in the night sky has inspired myths, legends and works of art.
Many photographers want to capture those celestial wonders and create something that can evoke some of those emotions. The big question how do you that?

Equipment for Night Sky Photography
Lets start with the equipment you will need:
- A sturdy tripod
- A camera with interchangeable lenses
- A wide angle lens (14 mm - 35 mm) with a large aperture. i.e. F 2.8 is recommended but not necessary, F 4 or 5.6 works also
- A head lamp or flashlight

Location and Timing
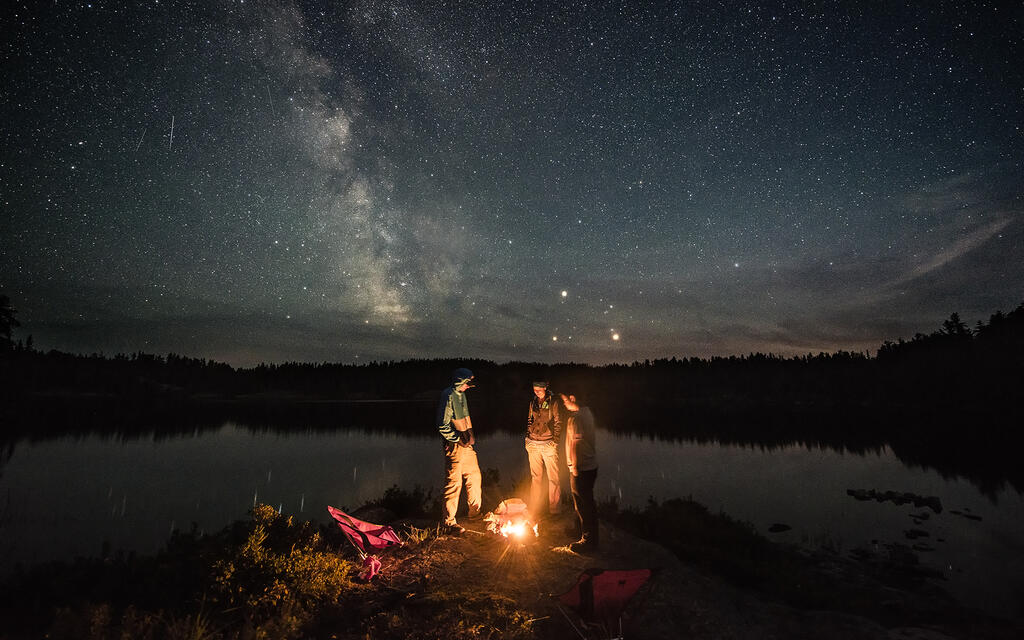
The next requirement is a dark location away from towns and city lights to minimize light pollution. You will be surprised on how sensitive modern cameras are to light.
Next is a clear night to see the skies without clouds and the moon. If you live in an urban area, you will have to take a drive to find a designated dark sky area, which is best or any area without the lights of towns etc.
The further north you go, the better the opportunities. In the Ontario Highlands try these two recommended areas, North Frontenac Dark Sky Preserve or the Lennox & Addington Dark Sky Viewing Area.

Setting Up On Site
Now we need to set up the tripod with your camera. Stability is crucial for capturing sharp images of the stars. Make sure your tripod is on a solid surface to avoid any camera shake.
Let’s get the camera ready. I like to adjust some of my settings in a well lit area. First, turn off your auto focus and set your focus to infinity. This ensures that stars, which are at an infinite distance, are in focus. You will shoot in Manual Mode, this gives you full control over settings like aperture, shutter speed, and ISO. Again in a well lit area, set your ISO to 1600 (this is a starting point)
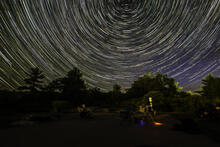
Next set your Aperture to wide open ( this is the lowest f-number your lens allows, e.g., f/2.8) Now set your Shutter Speed. I will start with 15 seconds then move up to 30 seconds (experiment to find the right exposure time) Caution here, the planet revolves at 25,000 miles per hour so if your exposure time exceeds 30 seconds, the stars will start to look like little lines rather than sharp points of light. Also called star trailing.
Getting it Right
Now it’s creating a composition, find an interesting foreground that will enhance your celestial image. You will need to use a remote shutter release or the camera’s self timer set to 5 seconds. Keeping your hands off of the camera’s shutter release allows for sharper images.

Try a few test images here to check exposure, focus, and composition. Adjust your settings as needed based on the results. Experiment with long exposures and your ISO. If 1600 is to dark, try 3200 or 6400. This will allow the camera to expose for more stars and details in the night sky. Remember if you don’t have a 2.8 lens, you will have to experiment to get an optimal exposure. Each increase in an f-stop cuts the light in half.
If you want to photograph the moon rising — see attached image, the moon’s brightness is equivalent to a cars headlight. Metering the overall scene will generally result in an over exposed moon. (Too bright, little detail) The best way is to bracket the scene, take a series of images at different shutter speeds to see which one works best.

Tips for Success
A couple of notes here. When taking a photo of the night sky, with your camera on a tripod, try using this technique which tells you how long you can expose before the stars begin to trail.
Take the number 500 and divide by the focal length of your lens. For example, if you have a 24 mm wide angle lens, then 500 / 24 = 22 seconds.
This is an old rule but it can help you establish an optimal shooting time. Another one is mirror lock up on a non mirrorless camera (DSLR), this too will help minimize camera shake. Those using a mirrorless camera do not have this problem.
If you have a iPhone 11 or higher version, you can use the night mode camera feature for stunning night photography.
If you are shooting with friends and you need to adjust your settings, make sure all have finished their shots before turning on your headlamp.
Editing Your Images
Now we came to Post-Processing. Using Adobe Lightroom or Photoshop will go a long way to bringing out the detail in your images. Shooting in RAW rather than jpeg is recommended.


Celestial or astro-photography requires patience and practice: It can be challenging, so don’t be discouraged if your first attempts don’t turn out as expected. Keep practicing and refining your techniques to capture stunning night sky photos.
Storyteller: